Cart
0

An alternator decoupler pulley (OAD) is a spring-damped, overrunning pulley that absorbs belt tension spikes and lets the alternator free-wheel during rapid deceleration. If yours buzzes after shutdown, spins freely in both directions, or the belt is chewing through itself early, replace it with the exact OAD your engine calls for, or fit a rebuilt alternator if the unit is due anyway.
TL;DR:
- Using an incorrect pulley type, such as swapping an OAD for an OAP or solid pulley, can cause rapid belt and tensioner wear due to mismatched vibration absorption.
- An OAD from one engine configuration will not function properly on a different engine, making precise part matching essential for longevity and noise reduction.
- Signs of a failing OAD include post-shutdown buzzing, belt chirping at idle, visible pulley vibration, and recurring belt wear within a few months.
- Replacing an OAD with the correct tools requires specialized spline and holding tools; improper removal or installation risks spline damage or misalignment.
- Opting for a rebuilt alternator with a matched OAD often saves time and money if pulley failures recur, especially on high-mileage, high-stress engines.
Table of Contents
- What Is an Alternator Decoupler Pulley, and How Is It Different From an OAP or Solid Pulley?
- How Do You Tell a Decoupler Pulley Is Failing?
- What Tools Do You Need to Remove and Install an OAD?
- Does Your Engine Actually Take This Exact Pulley?
- When Does a Rebuilt Alternator Make More Sense Than Just Swapping the Pulley?
- What Does It Cost to Replace an Alternator Decoupler Pulley?
- How Long Does an Alternator Decoupler Pulley Replacement Take?
- What Brands and Quality Tiers Should You Know?
- What Warranty and Lifespan Should You Expect on a Replacement Pulley?
- What Happens If You Install the Wrong Pulley Type?
- The Overlooked Variable in Every “Bad Pulley” Diagnosis
- Order a Rebuilt Alternator From Rebuild Masters
- Sources
- FAQ
What Is an Alternator Decoupler Pulley, and How Is It Different From an OAP or Solid Pulley?
A solid pulley is just a wheel bolted to the alternator shaft. It spins at whatever speed the belt dictates, transmitting every jolt from engine firing pulses straight into the belt and tensioner. An overrunning alternator pulley (OAP) improves on that with a one-way clutch, letting the alternator coast when the engine decelerates, but it has no spring damping.
The OAD goes further. Inside the housing sits a coil spring paired with a clutch mechanism, and together they do two jobs at once: decouple the alternator’s rotational inertia from belt speed changes, and absorb torsional vibration from the crankshaft. That combination is why Litens, the company that engineered the original OAD, built it specifically to cut noise, vibration, and harshness while extending belt and tensioner life.
The catch: OADs are tuned to a specific engine’s firing pulse frequency, and a few things follow from that:
- An OAD from a V6 will not behave correctly on a four-cylinder, even if the bolt pattern matches.
- Swapping in an OAP or solid pulley where an OAD belongs removes the spring damping the belt system was engineered around.
- Pulley type, spring rate, and clutch engagement are matched to the accessory drive as a unit, not sold as generic interchangeable parts.
Treat pulley type as engine-specific hardware, not a universal wear part.
How Do You Tell a Decoupler Pulley Is Failing?
A failing OAD rarely announces itself with a warning light. It shows up as noise and wear patterns that mimic other belt problems, which is why misdiagnosis is common.
Watch for these signs, roughly in the order techs report seeing them:
- A buzzing or rattling noise after you shut the engine off. The spring inside the decoupler is worn or the clutch is slipping, letting the pulley oscillate as everything spins down.
- A chirp or squeal from the belt area at idle, especially cold, that fades as RPM rises.
- Visible vibration at the alternator pulley when you shine a light on the belt with the hood open and the engine running.
- Belt or tensioner wear that shows up again within a few months of a fresh belt install.
On the bench, spin the pulley by hand in both directions. It should turn easily one way and resist firmly the other, with some spring give. A pulley that spins freely both ways has failed, according to the diagnostic guidance in Rick’s Free Auto Repair Advice walkthrough on OAD replacement. Minor looseness in the spring only matters if it’s producing audible noise or belt wear in the vehicle.
Before you condemn the pulley, rule out misalignment or a worn tensioner. Both cause similar chirping and vibration.
Pro Tip: Feel the belt near the alternator pulley after a 15-minute highway run. Misalignment often runs several degrees off and can push belt temperatures up meaningfully, per Gates’ technical bulletin on pulley alignment, which cuts belt life substantially. A hot spot near one pulley points to alignment, not the decoupler.
What Tools Do You Need to Remove and Install an OAD?
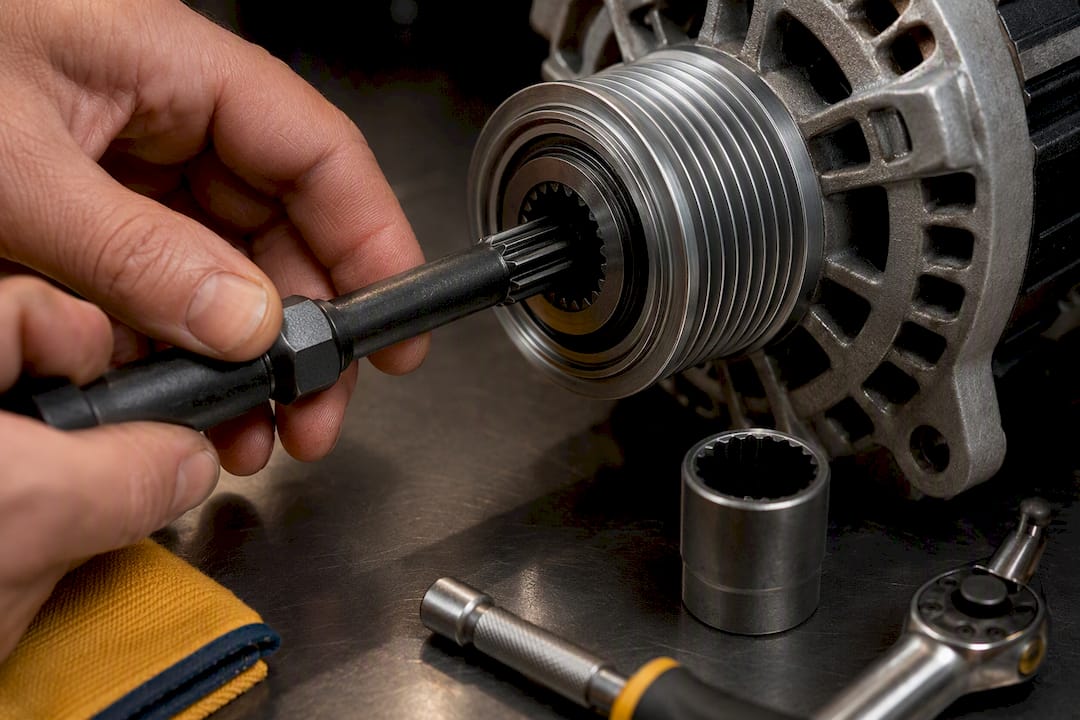
This is not a job for an adjustable wrench and hope. OAD pulleys use a splined shaft design specifically so they can’t be spun off with a standard socket, which means you need a counterhold tool before you touch a breaker bar.
A proper alternator decoupler tool kit typically includes:
- A 33-spline socket sized to fit over the pulley face and engage the internal splines.
- A pass-through hex or T50 Torx bit that reaches through the spline socket to hold the alternator’s rotor shaft steady.
- A 10mm hex shaft bit and 17mm pulley socket for common North American fitments.
- A breaker bar or ratchet long enough to break the retaining nut loose without excessive force.
The Lisle 57650 Alternator Decoupler Tool Set bundles most of these into one kit built for exactly this job, and OTC’s alternator pulley service kit works on the same principle: hold the shaft still with one tool while you break the nut free with another.
Removal, at a glance:
- Release belt tension and slip the belt off the pulley.
- Seat the spline socket over the pulley face.
- Pass the Torx or hex bit through the spline socket to lock the rotor shaft.
- Apply the breaker bar to the spline socket and break the nut loose.
- Spin the old pulley off by hand once the nut clears.
Installation reverses the process: thread the new pulley on by hand first to avoid cross-threading, then torque to the manufacturer’s spec. Example service write-ups cite typical service torque values for many applications, but that number varies by vehicle, so check the service manual’s tool and torque callout for your specific engine before you commit a wrench to it.
A quick number worth remembering: misalignment as small as a few degrees can significantly increase belt operating temperature and reduce belt life substantially, according to Gates’ bulletin. Recheck alignment after every pulley swap, not just before.
The most common mistakes: cross-threading the retaining nut because the pulley wasn’t hand-started straight, stripping the internal splines by forcing a poorly seated socket, and grabbing an OAP or solid pulley because it physically bolts up. All three turn a 30-minute job into a comeback.
Does Your Engine Actually Take This Exact Pulley?
Fitment mistakes on OADs don’t just cause a squeak. They cause cascading damage, because the whole point of the decoupler is absorbing vibration the rest of the drive system was never built to handle on its own.
Litens, which holds the original OAD design, is direct about this: these pulleys are matched to an engine’s specific firing pulse characteristics, and swapping a non-OAD pulley into a system engineered for one can trigger rapid failure of the belt and surrounding components. Industry engineers sometimes call the result a “mechanical virus,” a wrong pulley introduces vibration modes the tensioner and belt weren’t designed to absorb, and that stress works its way outward.
A few practical guardrails:
- Match the pulley by engine code and OAD part number, not just by bolt pattern or visual similarity.
- If a belt is glazed, cracked, or showing temperature discoloration, inspect the tensioner and idler pulleys at the same time. Isolated pulley replacement on an otherwise worn belt system often means a second repair within months.
- Rotate to a fresh belt whenever you replace the OAD. The labor overlap is minimal and it removes one more variable from your NVH diagnosis.
- Inspect the accessory belt system roughly every 60,000 miles, sooner if you’re seeing any of the noise symptoms covered above.
Get the pulley type right, and the decoupler quietly does its job for years. Get it wrong, and you’re back under the hood chasing a noise that keeps moving.
When Does a Rebuilt Alternator Make More Sense Than Just Swapping the Pulley?
If the decoupler has failed once, it’s a straightforward pulley swap. If it’s failed twice, or the alternator itself is showing weak charging output alongside the noise, you’re not looking at a pulley problem anymore. You’re looking at a unit that’s reached the end of its service life.
Rebuilt alternators arrive with a fresh OAD already matched to the correct engine application, eliminating fitment guesswork. That eliminates the fitment guesswork entirely.
Three product matches solve the most common versions of this repair directly:
- The 13767 alternator for 98-02 Honda Accord and 98-99 Acura CL covers a platform where decoupler noise complaints are common after 100,000 miles.
- The 13940 alternator for 02-06 Nissan Altima fits a generation known for accessory belt chirp that owners often misdiagnose as a tensioner issue.
- The 11150 alternator spans four related platforms: Acura TL and MDX, plus Honda Odyssey and Ridgeline, all sharing a drive-belt architecture where OAD wear is a recognized service pattern.
If you’re chasing recurring pulley failure on any of these, replacing the alternator assembly outright often costs less in labor over time than repeat pulley jobs.
What Does It Cost to Replace an Alternator Decoupler Pulley?
The pulley itself is a relatively inexpensive part compared to the alternator it rides on, but labor is where the range widens. A shop job typically runs somewhere between one and two hours of billed time, since most of that time goes toward accessing the pulley, not the swap itself, which usually takes minutes once the correct tools are seated.
Total cost swings on a few factors:
- Access difficulty. Some engine bays put the alternator pulley in an easy reach; others require removing a splash shield, a motor mount brace, or an intake component first.
- Whether the belt and tensioner get replaced at the same time. Doing all three in one visit adds parts cost but saves a second labor charge down the road.
- Shop rate and region. Independent shops typically undercut dealership labor rates, sometimes substantially, for the same job.
DIYers with the right tool kit skip the labor charge entirely and pay only for the pulley itself, which is one of the strongest arguments for investing in a dedicated spline socket and counterhold set if you’re doing this more than once. A shop quote that seems high often reflects diagnostic time spent confirming it’s actually the decoupler and not a tensioner or alignment issue, work that’s easy to shortcut with the checks covered earlier in this guide.
If the alternator itself needs replacement rather than just the pulley, that changes the cost equation entirely, since you’re paying for a full remanufactured unit instead of a single component.
How Long Does an Alternator Decoupler Pulley Replacement Take?
For a shop with the right tools already on the bench, a standalone OAD swap is usually a same-day job, often completed in under two hours once the vehicle is on the lift. The bottleneck is rarely the pulley itself. It’s diagnosis time spent confirming the decoupler is actually the source of the noise rather than a tensioner, idler, or alignment problem.
A DIYer working in a driveway should budget more time on the first attempt, mainly for locating the correct spline size and confirming torque specs before starting. Once you’ve done one, subsequent replacements on the same vehicle platform go faster because you already know exactly which tool combination fits.
A few things extend turnaround beyond the baseline:
- Parts availability. Engine-specific OADs aren’t always on a shop’s shelf, so same-day completion sometimes depends on local parts distribution rather than labor time.
- Combined work. Replacing the belt, tensioner, and pulley together in one visit takes longer than the pulley alone but avoids a return trip.
- Corroded or seized fasteners. A retaining nut that’s been in place for 100,000+ miles occasionally needs penetrating oil and extra time to break loose without stripping the splines.
If the diagnosis points toward the alternator itself rather than just the pulley, turnaround shifts toward however long it takes to source the correct remanufactured unit. Same-day shipping on a rebuilt alternator can keep that timeline close to what a pulley-only repair would have taken anyway.
What Brands and Quality Tiers Should You Know?
Not every decoupler pulley on the market is engineered the same way, and the tier differences show up in how long the part lasts, not just in price.
OEM and OE-matched pulleys come from or match the original manufacturer’s specification exactly, spring rate, clutch engagement, and firing-pulse tuning included. Litens, as the company behind the original OAD design, supplies pulleys that many vehicle manufacturers install from the factory, and its parts remain the benchmark for correct engineering rather than close-enough compatibility.
Aftermarket tiers vary widely. Some aftermarket manufacturers reverse-engineer OE specifications closely and produce a reliable, direct-fit part. Others cut corners on spring quality or clutch material to hit a lower price point, and those tend to show the buzzing or free-wheel symptoms covered earlier within a much shorter service window.
Tool manufacturers matter almost as much as pulley brands. A quality kit like the Lisle 57650 set reduces the risk of stripped splines during installation, which protects whatever pulley quality tier you chose. A premium OAD installed with a mismatched or worn-out spline tool can fail prematurely, not from a manufacturing defect, but from installation damage that never gets diagnosed correctly.
The safest approach for a first-time repair: match your pulley tier to how long you plan to keep the vehicle. A daily driver you’re keeping for years justifies paying for OE-matched parts. A vehicle you’re patching up for a near-term sale doesn’t carry the same math.
What Warranty and Lifespan Should You Expect on a Replacement Pulley?
A correctly matched OAD, installed with proper tools and torque, typically lasts through one full belt service interval, often 60,000 to 100,000 miles depending on the vehicle and driving conditions, though exact figures depend on your specific engine and accessory load.
Warranty terms vary by manufacturer and retailer, so confirm coverage length and what it includes, parts only, or parts and labor, before you buy. A pulley that fails well inside its expected service window is often a sign of an installation problem rather than a defective part: a stripped spline, incorrect torque, or a belt alignment issue that was never corrected at the time of the swap.
A few practical expectations worth setting:
- Premature buzzing or free-wheel failure within the first few thousand miles usually points to installation error, not part quality, so revisit your torque spec and belt alignment before filing a warranty claim.
- Keep your receipt and note the torque value used during install. Warranty claims move faster when you can show the job was done to spec.
- If the pulley failed because the alternator itself is at the end of its service life, a warranty replacement on just the pulley solves the noise temporarily but not the underlying problem.
Rebuilt alternators typically carry a warranty on the complete unit rather than just the pulley, which matters if you’re weighing a component swap against a full assembly replacement.
What Happens If You Install the Wrong Pulley Type?
The immediate risk of a wrong pulley is noise. The real risk is what it does to everything downstream of it.
An OAD is engineered to absorb torsional vibration that would otherwise transmit directly into the belt and tensioner. Swap in an OAP or solid pulley where an OAD belongs, and that vibration has nowhere to go. It hits the belt first, accelerating wear and raising operating temperature, then works into the tensioner, shortening its service life too. Litens describes exactly this chain reaction when a non-OAD pulley replaces an OAD in a system engineered around one, warning that mismatched pulleys can trigger rapid failure across multiple belt-drive components rather than staying contained to the pulley itself.

There’s also a charging-system angle that gets overlooked. If the alternator pulley isn’t spinning the way the voltage regulator expects, especially during rapid deceleration when an OAD would normally free-wheel, output can become inconsistent. Drivers sometimes chase a flickering dash light or intermittent charging complaint for weeks before anyone checks whether the pulley type matches the application.
The fix costs nothing extra beyond doing the fitment check correctly the first time: confirm the engine code, confirm the OAD part number against it, and resist the temptation to install whatever pulley happens to bolt up. A pulley that physically fits is not the same as a pulley that belongs there.
The Overlooked Variable in Every “Bad Pulley” Diagnosis
Most guides treat decoupler failure as a binary: the pulley is either good or bad, spin it and find out. That test is useful, but it skips the step that actually separates a fast, permanent fix from a comeback repair, which is confirming why the pulley failed in the first place.
A pulley rarely fails in isolation. It fails because of misalignment nobody measured, a tensioner that was already marginal, or an OAD swapped in without confirming it matched the engine’s firing pulse tuning. Replace the pulley without addressing that root cause, and you’ll be back under the hood in a matter of months, this time more frustrated because you “already fixed it.”
The conventional advice, spin the pulley, replace if loose, isn’t wrong. It’s incomplete. The alignment check and the fitment check deserve equal weight, not an afterthought after the repair. If you’re a shop tech, that means billing for the extra ten minutes of diagnostic time. If you’re a DIYer, it means resisting the urge to grab whatever pulley shows up first in a parts search.
And if the alternator itself is on its second or third pulley failure, stop treating it as a pulley problem. That’s a unit at the end of its service life, and a remanufactured replacement solves the actual issue instead of the symptom.
— Ismael
Order a Rebuilt Alternator From Rebuild Masters
Remanufactured alternators ship with new components and are tested to meet or exceed OEM specifications, helping avoid issues with pulley fitment.
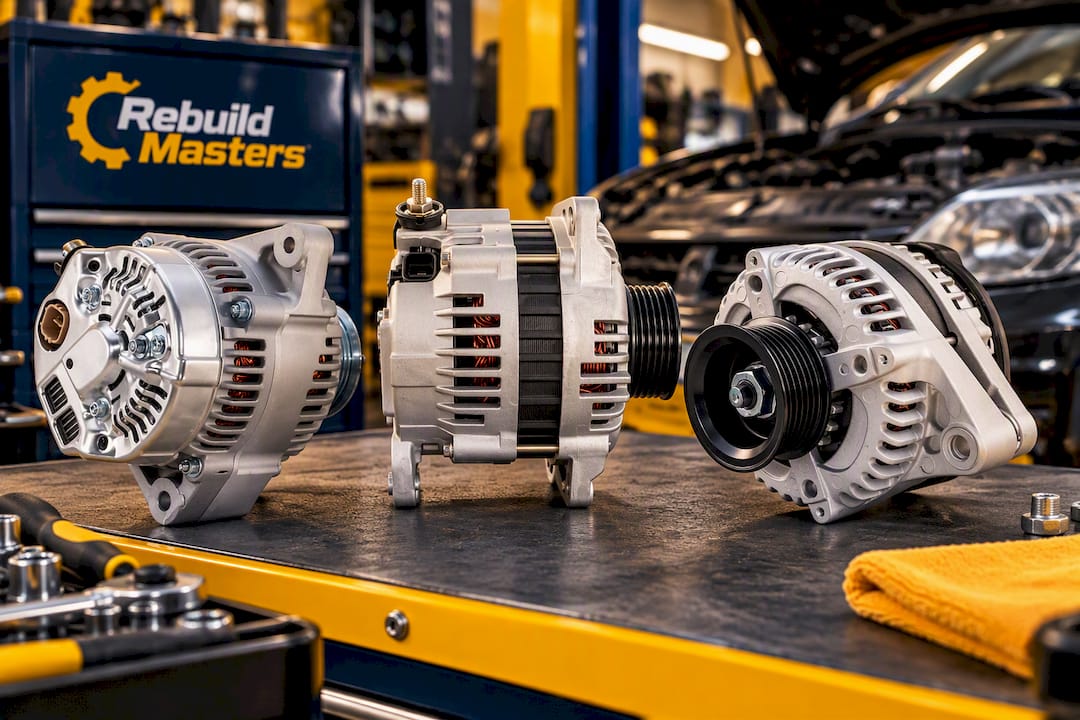
Start by confirming your vehicle against the exact SKUs covered in this guide: the 13767 for Honda Accord and Acura CL, the 13940 for Nissan Altima, and the 11150 covering Acura TL, Acura MDX, Honda Odyssey, and Honda Ridgeline. Before ordering, run the bench spin test and the alignment check covered above. If the pulley alone is loose but the alternator charges fine, a pulley-only fix may hold. If you’re on a second failure or seeing weak output, order the full rebuilt alternator instead.
Browse the complete rebuilt starters lineup if you’re addressing a starting issue on the same visit, and check the returns policy before you order if you want the specifics on inspection and exchange terms. Same-day shipping means you can usually get the correct part moving the day you confirm fitment.
Sources
- Overrunning Alternator Decoupler (OAD)™ - Litens Automotive Group
- Gates technical service bulletin (TSB_0054)
- 57650 Alternator Decoupler Tool Set | Lisle Corporation
- How to replace an alternator decoupler pulley — Ricks Free Auto Repair Advice
FAQ
What Does an Alternator Decoupler Pulley Do?
An alternator decoupler pulley absorbs belt tension fluctuations and lets the alternator free-wheel during rapid engine deceleration, using an internal spring and clutch mechanism. That combination cuts noise and vibration transmitted into the belt system compared to a solid pulley.
What Happens When an Alternator Pulley Goes Bad?
A failing decoupler pulley typically buzzes or rattles after engine shutdown, chirps at idle, and accelerates belt and tensioner wear. Left unaddressed, a mismatched or failed pulley can trigger cascading damage to the tensioner, belt, and accessory bearings.
What Are the Different Types of Alternator Pulleys?
The three main types are solid pulleys, one-way overrunning pulleys (OAP), and overrunning alternator decouples (OAD). Solid pulleys transmit every vibration directly, OAPs allow free-wheeling without spring damping, and OADs combine both free-wheeling and spring damping in one engine-specific unit.
What Is the Best Tool for Removing an Alternator Pulley?
A dedicated kit with a 33-spline socket and a pass-through Torx or hex bit, like the Lisle 57650 or a comparable OTC service kit, is the correct approach. These kits hold the rotor shaft steady while you break the retaining nut loose, preventing stripped splines.