Cart
0
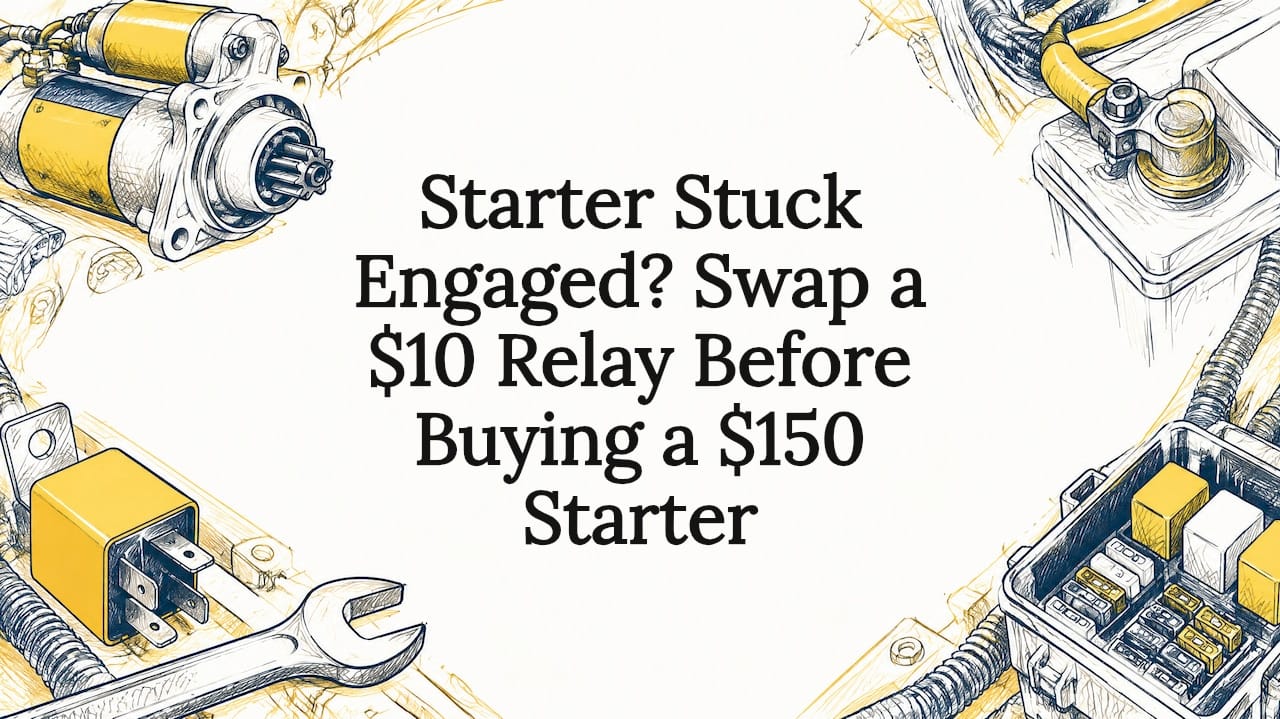
If your starter won’t stop spinning after the engine starts, disconnect the negative battery terminal immediately to cut power and prevent damage. The most likely causes are welded solenoid contacts, a stuck relay or ignition switch holding the signal wire energized, or a mechanical Bendix drive that’s binding. Once the vehicle is safe, test the S-terminal and swap the relay before you assume the starter itself needs replacement.
TL;DR:
- Disconnect the battery immediately if the starter continues spinning after starting to prevent wiring damage and fire risks.
- Test the S-terminal and swap the relay to identify electrical faults, as welded solenoid contacts and stuck relays are the most common causes.
- Inspect the starter and flywheel for damage if the starter remains engaged, especially if you hear grinding or see metal debris.
- Use voltage drop and resistance tests to pinpoint high-resistance connections or welded contacts in the circuit, ruling out wiring issues.
- Replace the starter with a remanufactured unit if internal faults are confirmed, ensuring fitment with VIN and engine codes for reliable repair.
Table of Contents
- How to stop a running starter and immediate safety steps
- Electrical vs mechanical causes: how each makes the starter stay engaged
- Step-by-step diagnostics (safe order to isolate upstream vs internal faults)
- Inspecting for starter and flywheel damage, what to look for and next steps
- What you can try now and realistic repair choices
- Publisher solution: how our starter catalog meets this failure scenario
- Diagnostics for starter solenoid coil resistance and continuity testing
- Impact of environmental factors on starter engagement
- Role of neutral safety switch or clutch interlock switch in starter engagement issues
- Common symptoms and diagnostic approach to starter motor overheating
- Use of diagnostic tools and scanners for electronic starting system faults
- Preventative maintenance tips to avoid starter getting stuck engaged
- How to order a replacement remanufactured starter and get help
- Author perspective: how I would decide to DIY or call a shop
- FAQ
- Sources
How to stop a running starter and immediate safety steps
A starter that keeps spinning after the engine fires is drawing continuous high current, and that current has to go somewhere. Left alone, it can melt wiring, burn out the starter windings, or chew up the ring gear teeth on the flywheel. Cutting power fast is the only way to stop it safely.
Locate your battery and keep a wrench sized for the terminal nut within reach before you start any test. Here’s the order that matters:
- Pop the hood and find the negative (black, marked “-”) battery terminal.
- Loosen the clamp nut with a wrench and lift the cable straight off the post.
- Set the cable aside so it can’t accidentally touch the terminal again.
- Wait a few minutes, then check the starter area for heat, smell, or loose cables before reconnecting anything.
If you see visible fire or heavy smoke, don’t touch the vehicle. Step back and call for emergency help or a tow instead of attempting a DIY fix.
Pro Tip: Keep a small adjustable wrench in your glovebox. Knowing exactly where your negative terminal is before an emergency saves precious seconds.
Electrical vs mechanical causes: how each makes the starter stay engaged
Two very different problem families produce the same symptom: a starter that won’t let go. Separating them early saves you from replacing the wrong part.
On the electrical side, welded solenoid contacts are the most common culprit. Low battery voltage combined with high resistance in the circuit can cause arcing strong enough to fuse the internal contact disc to its terminals, according to Triviatime, which leaves the starter stuck “on” until you physically interrupt power. Starter circuits also demand very high peak current, and rising contact resistance from pitting over time increases the odds of this kind of arc damage, as detailed in an overview of automobile starting system faults.
A second electrical path is a stuck relay or an ignition switch mechanically trapped in the START position, both of which keep the small signal wire (the S-terminal) energized long after you’ve released the key. A short-to-power on that same signal wire, often from harness insulation rubbing against a bracket or exhaust heat shield, produces the identical symptom.
On the mechanical side, the Bendix drive gear can stick forward against the flywheel if its return spring breaks or weakens, or if the starter was installed with the wrong shim spacing and binds against the ring gear.
Here’s how to map symptoms to the likely bucket:
- Starter spins continuously even with the key removed: check relay and ignition switch first.
- Starter stops the instant you disconnect the S-wire: the fault is upstream, not inside the starter.
- Starter keeps spinning after the S-wire is disconnected: the solenoid or internal contacts are physically stuck or welded.
A shop-grade signal: voltage-drop testing at the starter during crank is a standard way technicians confirm high-resistance connections that lead to arcing and pitting, as described in Drive Sense’s symptom map for intermittent no-start issues.
Step-by-step diagnostics (safe order to isolate upstream vs internal faults)
Work through these in order. Stopping at the first positive result tells you exactly where the fault lives.
- Look and smell first. Check for scorched wiring, a burning smell, or warning lights on the dash, and note whether your vehicle has an immobilizer that might be flashing a security light.
- Test resting battery voltage. A healthy battery should read close to 12.6 volts at rest. A low reading points toward the voltage and resistance conditions that cause solenoid contacts to weld.
- Check voltage drop during crank. Measure between the battery negative post and the starter body, then across the positive cable, while someone cranks the engine. High drops indicate corroded or loose connections that can cause arcing, a pattern shops routinely check before installing new parts, per Drive Sense.
- Clean and torque both terminals. Corrosion alone can mimic a failing starter.
- Find and disconnect the small S-wire at the starter solenoid (it’s thinner than the main battery cable). If the starter stops immediately, the problem is upstream in the relay, switch, or wiring, not inside the starter itself.
- Swap the starter relay with an identical relay from elsewhere in the fuse box, such as the horn or AC relay. This is a widely used field test to confirm a stuck-closed relay, recommended in Homebuddy.
- Check for 12V at the S-terminal with the key turned to Start. Voltage present after you release the key confirms the control circuit, not the starter, is holding things open.
- Fused jumper bypass test, for experienced DIYers only: briefly jumping the S-terminal with a properly fused test lead can confirm solenoid response without risking a direct short. Stop here if you’re not comfortable with electrical testing and hand the car to a mechanic instead.
- Document everything you find, including video of the symptom, timestamps, and any heat or smoke you observed, so a mechanic can skip repeating tests you’ve already done.
Pro Tip: Always test the relay and S-terminal before buying a new starter. Relay and ignition-switch failures commonly masquerade as starter failures, and swapping a $10 relay beats replacing a $150 part on a guess, per Homebuddy.
Inspecting for starter and flywheel damage, what to look for and next steps
A starter stuck engaged doesn’t just risk the starter. It risks the flywheel’s ring gear, and that’s a far more expensive repair if it goes unchecked.
Watch and listen for these warning signs:
- Grinding or screeching noises during or right after startup.
- Metal filings or shavings visible near the starter mounting area.
- Visibly missing, chipped, or mushroomed teeth on the ring gear, viewable through the starter inspection cover on many engines.
- Difficulty turning the engine by hand (only attempt this if you know how to do it safely, typically through the crankshaft bolt).
Damage escalates quickly under continuous engagement because the pinion gear keeps grinding against the same contact points on the flywheel instead of disengaging cleanly. A few seconds of continued spin can round off teeth that took years to wear evenly.
If you spot chewed teeth or significant metal debris, towing to a shop is the safer call rather than attempting to drive. Common shop repairs at that point include ring gear resurfacing or full replacement, along with a new starter drive assembly to match. Our guide to warning signs that a starter is failing walks through more of these early indicators.
What you can try now and realistic repair choices
Once you’ve confirmed the fault and the vehicle is safe, you have a few paths forward depending on your comfort level and the tools on hand.
Temporary measures to reach a shop:
- Disconnect the battery to stop the spinning, then reconnect briefly only to test, not to drive long distances.
- A single firm tap on the starter housing with a hammer sometimes jars welded contacts loose, but treat this as a stopgap only.
- Avoid repeated start attempts. Each one risks reheating and re-welding contacts, per TriviaTime.blog.
DIY repair scope: removing the starter, cleaning the Bendix drive, inspecting the shaft and return spring, and replacing the solenoid or drive assembly are all within reach for someone comfortable with basic hand tools. Expect one to three hours depending on accessibility, plus a multimeter for electrical checks.
Professional repair: shops typically test for contact pitting, armature condition, brush wear, and drive engagement before recommending a rebuild versus a full replacement. Labor cost often rivals the price of the part itself on tightly packaged engine bays.
Pro Tip: A quality remanufactured starter, rebuilt with new wear components, often outperforms a cheap new aftermarket unit, since budget new parts frequently reuse lower-grade internal materials that fail the same way again.
Publisher solution: how our starter catalog meets this failure scenario
When testing confirms the starter itself, not the relay or wiring, is the problem, we stock remanufactured starters built for exactly this kind of failure. Three examples cover a wide range of Ford applications:
- The 3267 starter fits 97-98 F-Series trucks, 96-04 Mustangs, 97-98 Expeditions, and 97-05 E-Series vans.
- The 3273 starter fits 05-10 Mustangs, 97-10 Explorers, and 98-11 Rangers.
- The 6646 starter fits 99-08 Expeditions, 99-08 F-Series trucks, and 05 Mustangs.
Each unit goes through a rebuild process that replaces the contact disc, springs, and other wear components rather than just cleaning the old ones, which is exactly the part that welds or sticks in the failure described above.
Before ordering, have your VIN and engine code ready to confirm fitment, along with your existing starter’s part number if you can read it. Shipping is available for urgent repairs. Our overview of remanufactured starters explains the rebuild process in more depth.
Diagnostics for starter solenoid coil resistance and continuity testing
A multimeter set to resistance (ohms) mode can confirm whether the solenoid’s pull-in and hold-in coils are intact before you condemn the whole starter. Disconnect the starter and battery first, then probe across the solenoid’s small S-terminal and its case ground.
A healthy pull-in coil typically shows low resistance, usually just a few ohms, while an open or infinite reading signals a broken winding that would prevent the solenoid from engaging at all, not cause it to stick. That distinction matters because a stuck-engaged starter is almost never an open-coil problem. It’s usually a mechanically welded contact disc downstream of the coil.
Continuity testing between the main battery terminal and the motor terminal, with the solenoid plunger held engaged, checks whether the contact disc itself is making a clean connection. Readings that show continuity even after you release the plunger confirm welded or fused contacts, matching the failure mode described in TriviaTime.blog’s troubleshooting guide.

If your meter shows normal coil resistance and the welding is confirmed at the contact disc, that tells you the fault is internal to the solenoid assembly rather than in the wiring feeding it, which narrows your repair to a solenoid or full starter replacement rather than a wiring chase.
Impact of environmental factors on starter engagement
Dirt, corrosion, and moisture rarely cause a starter to stick engaged on their own, but they set up the conditions that lead to it. Road salt and moisture that reach the battery terminals or starter connections increase resistance at those joints, and that added resistance is part of what drives the arcing that welds solenoid contacts in the first place.
Corrosion buildup on the ground strap or battery terminals forces more current through a smaller contact area, generating heat that accelerates wear on the solenoid’s internal contact disc over repeated starts. A starter mounted low in the engine bay, as most are, is also exposed to road spray, oil residue, and dust that can work into the solenoid housing and interfere with the plunger’s return travel.
Humid climates and regions with heavy winter road salt see this pattern more often, simply because the terminals and connections corrode faster. Keeping battery terminals clean and lightly greased, and checking the starter’s electrical connections during routine maintenance, reduces the resistance buildup that contributes to contact welding down the line.
None of this replaces the diagnostic steps above. Environmental wear is a contributing factor that makes welding or sticking more likely over time, not a standalone cause you can diagnose by sight.

Role of neutral safety switch or clutch interlock switch in starter engagement issues
The neutral safety switch, on automatic transmissions, or the clutch interlock switch, on manuals, sits in the starter’s control circuit and is supposed to allow the start signal only when the transmission is in Park or Neutral, or when the clutch pedal is fully depressed.
A switch that’s misadjusted or has worn internal contacts can sometimes stay closed even after you release the key, which keeps the S-terminal circuit energized and mimics a stuck relay or welded solenoid. This is worth checking specifically on vehicles where the stuck-engaged symptom appears only in certain gear positions or only when the clutch pedal is at a particular point in its travel.
Testing this switch usually means checking continuity across its terminals in each shift or pedal position, comparing what you measure to the expected open or closed state for that position. If the switch shows continuity when it shouldn’t, that’s your upstream fault, and it’s a far cheaper fix than a starter.
This is also why the S-wire disconnect test described earlier is so useful: it doesn’t care whether the stuck signal comes from a relay, an ignition switch, or a bad neutral safety switch. Any upstream fault shows the same result when you pull that wire.
Common symptoms and diagnostic approach to starter motor overheating
Starter motors are built for short bursts of extremely high current, not continuous operation, so a starter that stays engaged for more than a few seconds starts cooking its own internals. The windings heat up fast, and that heat is part of what causes the contact welding described earlier.
Watch for a burning electrical smell, visible smoke from the starter area, or a starter that becomes too hot to touch safely after a stuck-engaged event. A starter that has overheated once is more likely to repeat the failure, since heat cycling degrades the internal insulation and contact surfaces even after you’ve freed a welded contact.
If you suspect overheating, let the vehicle sit and cool completely before attempting any further tests. Resuming repeated start attempts on a hot starter, or trying to “power through” a stuck condition, pushes more current through already-damaged contacts and makes re-welding more likely, which is part of why the emergency disconnect step at the beginning of this guide matters so much.
A starter that has overheated and been freed once is a reasonable candidate for replacement even if it’s currently working, since the internal damage from that heat event rarely fully reverses.
Use of diagnostic tools and scanners for electronic starting system faults
An OBD-II scanner won’t directly diagnose a mechanically welded solenoid contact, but it can rule out or confirm security system and immobilizer faults that sometimes produce similar no-start or stuck-crank symptoms. Checking for stored codes related to the immobilizer, ignition switch circuit, or body control module is a reasonable early step, especially on newer vehicles with electronic ignition systems.
A basic multimeter remains the most useful tool for the hands-on tests described earlier: resting voltage, voltage drop under crank, and continuity across the solenoid and safety switches. For readers chasing an intermittent fault that doesn’t reproduce on demand, a simple voltage-logging tool left connected to the S-terminal circuit can capture what happens the next time the symptom occurs, rather than relying on guesswork after the fact.
Security and immobilizer systems can interact with starting circuits in ways that mimic a stuck starter, which is worth knowing if your symptoms seem inconsistent or tied to specific unlock sequences. For readers troubleshooting an ignition cylinder that feels mechanically stuck rather than electrically faulted, Local Locksmith and Car Key’s guide on a stuck ignition key covers practical steps worth trying before assuming the starter itself is at fault.
Preventative maintenance tips to avoid starter getting stuck engaged
A handful of routine habits reduce the odds of ever facing this problem again.
- Clean and lightly grease battery terminals every few months to limit the resistance buildup that drives contact arcing.
- Replace a battery once it consistently reads below the healthy 12.6-volt resting range rather than waiting for a full failure.
- Have voltage drop checked during a routine service if your vehicle shows slow or hesitant cranking, since that’s an early sign of the same resistance problems that cause welded contacts.
- Address a security system or immobilizer warning light promptly rather than ignoring intermittent dash alerts.
- Keep the starter area free of built-up road grime where accessible, since dirt and moisture intrusion accelerates wear on the solenoid housing over seasons of driving.
Vehicle theft-deterrent systems and aftermarket security add-ons can also interact with starting circuits in ways worth understanding. Collision Auto Glass’s guide to preventing auto theft covers how immobilizer and security systems interact with your vehicle’s starting behavior, useful background if you’ve had aftermarket security work done. Our starter components and replacement guide also covers general starter upkeep in more depth.
How to order a replacement remanufactured starter and get help
Once diagnostics point to the starter itself, ordering a replacement is straightforward.

- Browse the full Rebuilt Starters catalog, or check Rebuilt Alternators if your diagnostics point that direction instead.
- Have your VIN, engine code, and old starter’s part number ready to confirm exact fitment.
- Every order includes a warranty and same-day shipping for urgent repairs, with support available if you’re unsure about fitment before you buy.
Author perspective: how I would decide to DIY or call a shop
If the S-wire test or a relay swap clears the fault, I’d fix it myself. Those are cheap parts and a few minutes of work. If I find welded contacts, suspect ring gear damage, or the starter is buried behind an intake manifold, I’d tow it to a shop instead of fighting accessibility and risking a bigger repair bill. Either way, I’d replace a confirmed-bad starter with a proven rebuilt unit rather than a bargain new one, and I’d keep a wrench and know exactly where my battery terminal is before I ever need it again.
— Ismael
FAQ
Why is my starter stuck engaged?
The most common causes are welded solenoid contacts from arcing, a relay or ignition switch stuck closed, or a mechanical Bendix drive that isn’t retracting. Testing the S-terminal and swapping the relay quickly tells you which one you’re dealing with.
What to do if the starter is stuck?
Disconnect the negative battery terminal immediately to cut power and stop the spinning. Once safe, run the S-wire disconnect test and a relay swap before assuming the starter itself has failed.
What can I do if my starter won’t disengage from the flywheel?
Check for a broken return spring or incorrect shim spacing, both of which can physically bind the Bendix drive against the ring gear. If you hear grinding or see metal filings, have the ring gear inspected before driving further, since continued engagement can damage the flywheel teeth.
How to disengage a stuck starter?
Cut power at the battery first, since that stops the electrical hold regardless of the cause. A single firm tap on the starter housing sometimes frees contacts that have welded from arcing, but treat it as a temporary measure and plan for proper diagnosis afterward.
Sources
- Triviatime
- Academia
- Intermittent no-start symptom map: Battery vs starter vs alternator vs security | Drive Sense
- Homebuddy